
I had mentioned on my previous article how to get CentOS 7 Installation Media and it was so simple to get the iso file and in this article, we will see how to install CentOS that we downloaded the installation media. If you want to download CentOS click here.
Generally you will see the pictures and you will understand what to do, mentioning about something in each step of installation is not necessary.
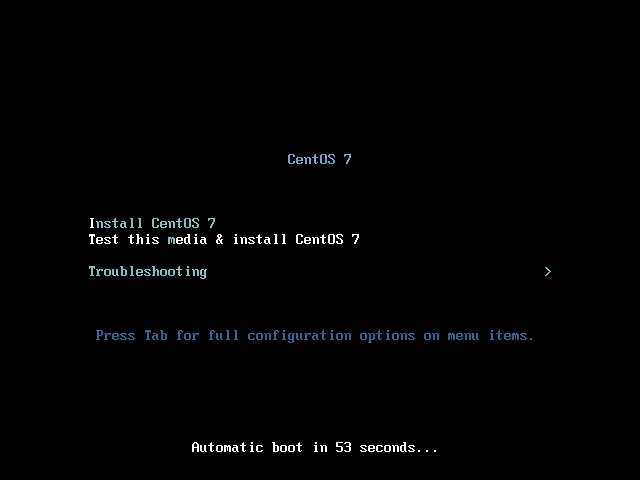
Let’s start.
CentOS Installation
I used single-core CPU, 4GB Ram, 20 GB HDD and changed my network adapter from NAT to Bridge on VMware Workstation. We start to installation clicking on the Install CentOS 7.

We see the installation summery field and need to change some setting according to our location and situation. In localization field, I will change the location which I live and keyboard which I use but there is a place into Date & Time field that we need to change after we set the network connection on because I want to use global NTP resources which located on CentOS servers. If you have NTP Server in your location, you can use it also. I’m going to mention it when the time comes.

As you see, I choose my location. Remember what I mentioned above about NTP Servers. You see there is a set place on Network Time, you can click on this button and set your NTP Server IP Address or FQDN addresses. You can set your NTP Servers as below and it will be activated if your network is connected. You can’t change these settings unless your connection is enabled.


Localization field has completed and it is time to set Sofware Selection. We don’t need to touch installation source field that we saw in the main page because we are going to use ISO file which was added in the beginning.
In the Software Selection section, I won’t change anything because I want to install minimal Installation and it is set as default. I click on the Done button.


In Installation Destination field, I set 20 GB HDD and I’m choosing it and it needs to choice as blow and I click on the Done button.


I prefer to disabled the KDUMP because It is going to use the memory and we don’t need to use it unless we don’t have a problem with related to system or services. It can be enabled later when it needs.

You can set a name for your CentOS in Hostname field, if you don’t click on the Apply button after you change your hostname, it won’t be changed. and you can also activate your Ethernet connection here. After you set everything in this part you can click on the Done button to ready your server to installation.

Everything is ready for installation and I click on the Begin Installation.

As you see, the installation has started and I need to set my root password after clicking on the Begin Installation. I don’t set the User Creation part because I’m going to use root account and everything will be root level.

Now I set my password and I need to apply twice because I set a weak password and system wants me to press on the Done button twice to accept the weak password. You should choose a strong password if you use it on real systems. This is a demo installation and I’m using a weak password.

Installation is completed and I click on the Reboot button to restart my server.


I log in to my new CentOS server and check something to sure everything is okay.

CentOS Installation article has completed, thanks for reading. If you want to read more about Linux you visit Linux category.
Have a great day.